(9/10)
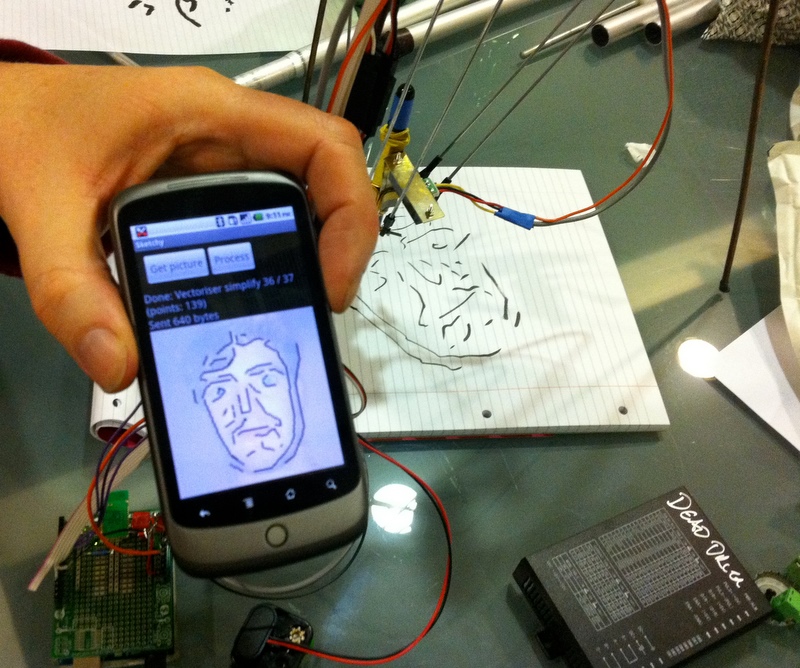
Sketchy is an Android->Bluetooth->Arduino portrait drawing machine, built as part of Dorkbot Bristol and Draw's mark-making project in November 2011.
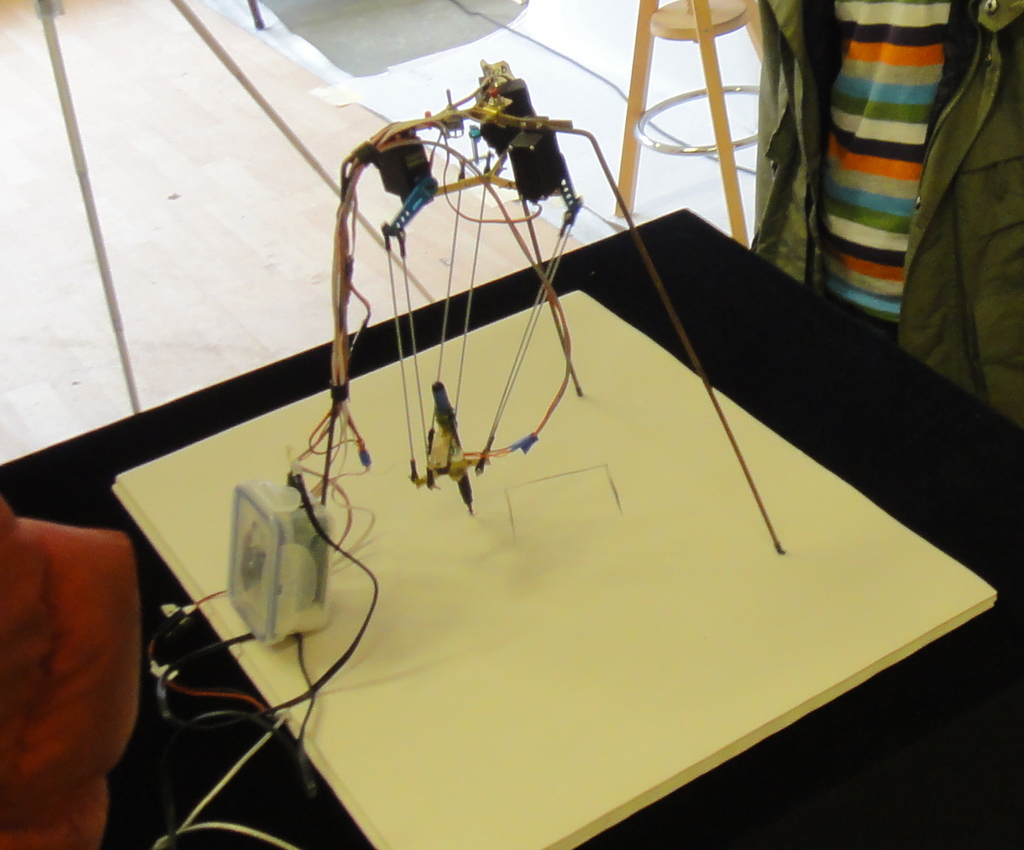
It uses an Android phone to capture images and process them, and a simple Arduino-powered delta robot wielding a brushpen to sketch them.
Sketchy has had several outings by now, and drawn hundreds of portraits. Here's a quick CV:
September 2010: Designersblock, as part of the London Design Festival
November 2010: Dorkbot/Draw in Stoke's Croft (Photos)
December 2010: iheartrobotics.com's "Best DIY Delta Robot and Delta Robot of the Year"
May 2011: Dorkbot Cardiff
June 2011: BV Studios/Windmill Hill City Farm's street party
August 2011: Puppet Place Open Doors Day as part of the Bristol Festival of Puppetry -
video is here
March 2013: Bristol Mini Maker Faire
June 2013: An outing to the Pervasive Media Studio
September 2013: The KWMC Make It! Festival
December 2013: The 2013 Model Engineer Exhibition At Sandown Park
This is Sketchy's first day out at Dorkbot Bristol. Thanks to Dan for the video, and Adam for the use of his likeness.
And at 100 Stoke's Croft, with Dorkbot and Draw:

All the information you need to build a Sketchy (or, preferably, to use Sketchy as the basis of an even more wonderful machine) should be here. Code, parts lists, and so on. If there's anything more you need to know, please send me a mail. And if you use this, or make your own delta after seeing Sketchy, definitely let me know: richard@jarkman.co.uk
Android phone (I used a Nexus One)
Arduino Duemilanove (any Arduino with a 328 will do)
NewSoftSerial library for Arduino
Here's the current Arduino and Android source in github. And for posterity's sake, the 2013 pre-github Android source and the Arduino source (20/9/2013 - updated to Arduino 1.0.5, fixed quiff bug)
And here's the original Android app APK, which you can run on any (sufficiently recent) Android phone:
And the new build we made for Giant Sketchy: Android app APK
The lifecycle goes like this:
- Pick a picture from the Android photo album
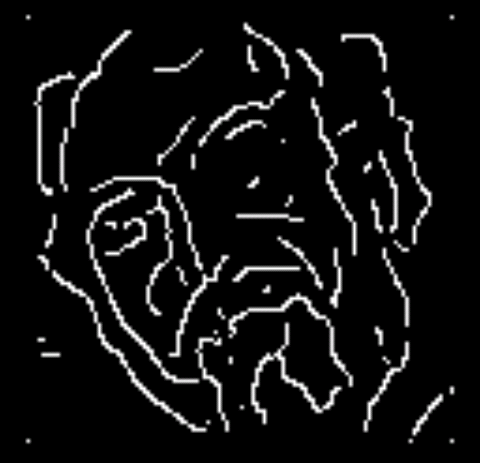
- Run a Canny edge-finder on it to get
to a black bitmap with white lines on the edges of the original picture.
I used a splendid implementation by Tom Gibara
- Run a vectoriser on that, to generate vectors along those lines. I couldn't find one I liked, so I write one, which was easier that I expected.
- Simplify the vectors - discard very short vectors, and replace straightish bits with straight lines. The Arduino can only store 300 points,
so we have a strong incentive to optimise the vectors to within an inch of their lives.
- Package the vectors up and send them over Bluetooth to the Arduino
- Wait for the drawing !
For speed, I'm working with very low-resolution bitmaps - 128 pixels square by default. That's all the resolution the delta robot can use, so we lose no useful information as a result. The image size, along with various parameters for the Canny and vectorisation algorithms, can be adjusted from the Settings UI in the Andoid app.
Source image:

Output of Canny edge detection:
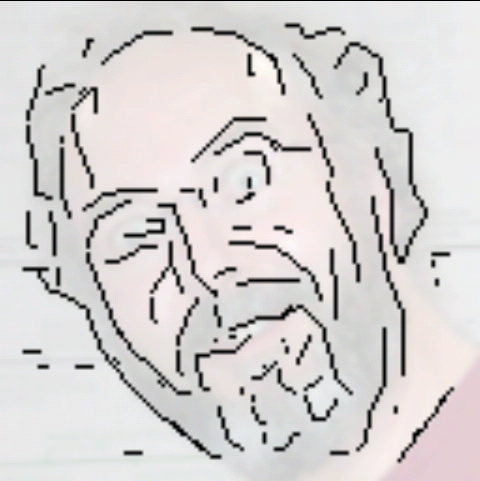
Simplified vectors (over a pale source image, so we can see the alignment):

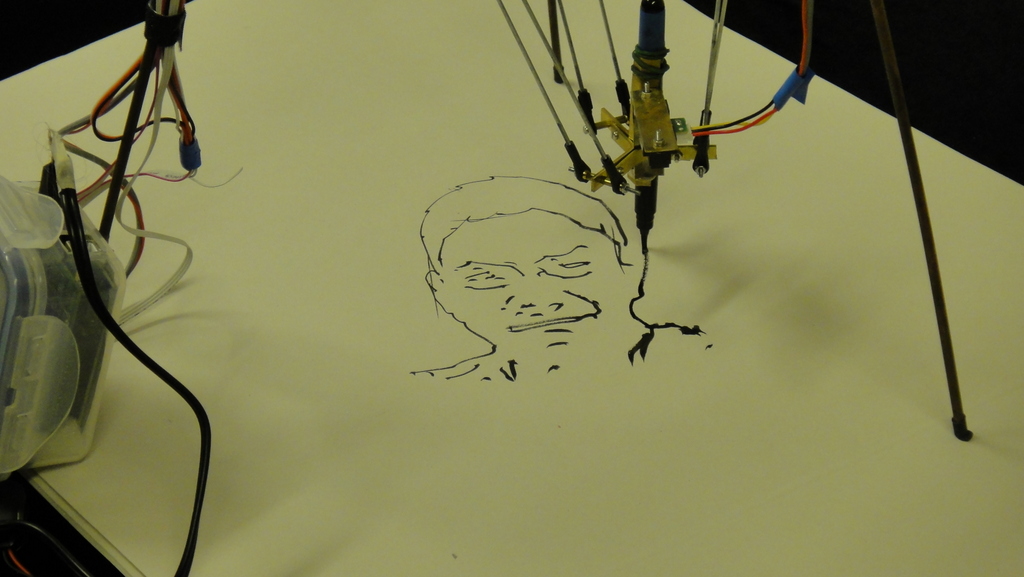
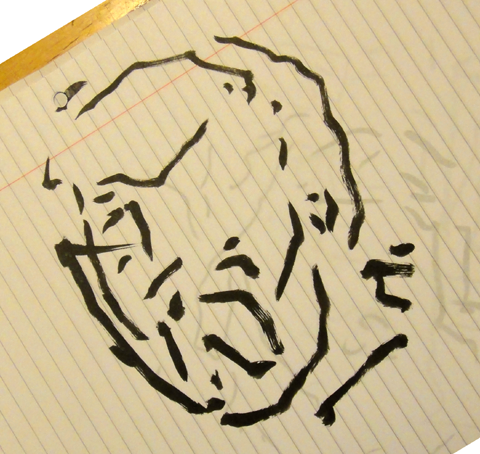
Which draws something like this (actually from a different run, so the lines are different in detail):
This is what you get with closer Canny thresholds and a smaller Gaussian width

And with a shorter short-line limit and less simplification of the vectors (this is actually on the 300-point limit, so this is as complex a picture as the Arduino will currently draw):
I really want to get better drawings out of this. That means (at least) four things:
- Controlling the lighting and backgrounds to get strong shadows on the faces of our subjects
- Tuning the Canny and vectoriser parameters to pick out the edges we most want
- Adding face-specific works to the algorithm - trying to pick out eyes and mouth, or at least provide more detail in those areas
- Improve the delta's drawing behaviour, with better motion control on low-angle corners to reduce mechanical wobble, and perhaps a stiffer frame too
The physical robot is documented here. Shouldn't take more than an afternoon and �50 of parts to put one together. Please ask me if there's any constructional detail missing, or if I can help. All the motion and path code described there is included in (and used in) the Arduino source above.
The part that I spent most time thinking about was the Bluetooth connection. In the end, getting it going was not painful, Here's the sequence I went through to bring it up:
The RN41 seems to be the module used in the �40 Bluetooth modules that Sparkfun and Cool Components sell. But it costs half as much. The downside is that it's tiny, and it has 3.3v logic levels. I was apprehensive about this bit. But, I managed to solder it OK, using a reasonably pointy soldering iron and an OptiVisor. I only needed four connections:
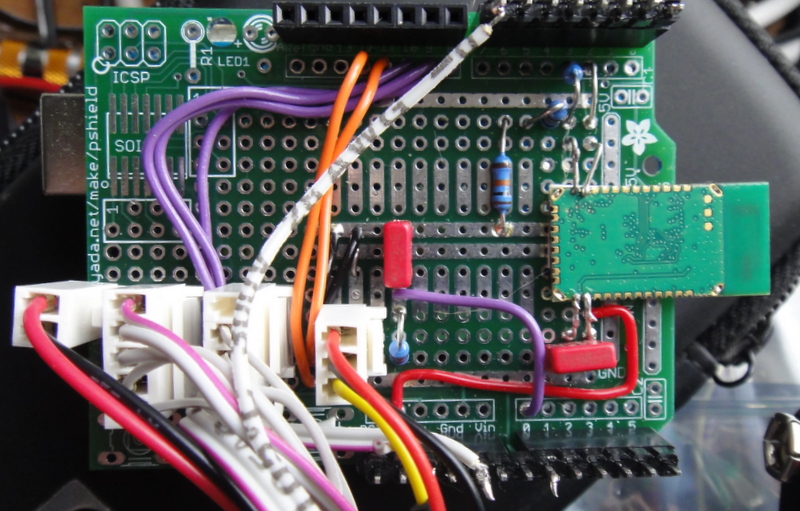
Complete wiring is:
RN41 pin 11 (VDD) to Arduino 3.3V out
RN41 pin 12 to Arduino ground
RN41 pin 13 (UART_RX) to Arduino TX on pin 3, via a 10k/20k divider to convert the 5v output to 3.3 (see RN41 datasheet, 'typical application circuit')
RN41 pin 14 (UART_TX) to Arduino RX on pin 2
Rowan used the same wiring and had no end of trouble with Arduino RX, which we put down to a disagreement at power-up time. He added a 10k resistor between RN41 pin 14 and Arduino pin 2,
which fixed it, presumably by limiting the current that flows when both pins are driven.
In 2013, Sketchy died, which in the end proved to be a sickly half-functional Bluetooth module. I added a status LED to GPIO5 on pin 21, as suggested in the data sheet, which made debugging easier, and a switch to GPIO4 to let me reset it to factory defaults. I still had to replace the RN41, though.
Having soldered it to a handy proto-shield, I powered it up (it uses the 3.3v line from the Aruino for power), and fired up the Bluetooth manager app on my laptop. That reported it as FireFly, paired with it quite happily, without needing a PIN. The module default is 1234, if you need it. The Bluetooth manager made it a COM port. Note the number of the port it gives you.
One lovely thing about the RN41 is that is can be configured from the Bluetooth side, not just the serial side. You have 60 seconds from when you power it up to send it the magic sequence, $$$, to put it into command mode. If you don't do that, it acts as a simple serial pipe. So, I powered up the Arduino and module, started a terminal emulator (Hyperterm, sadly), set it to that com port (and 115200 baud N81), and typed the command sequence, which is $$$. The module replies with CMD to indicate that it is in command mode. Note that the module does not echo your typing, so type carefully!
Then, I typed SN,Sketchy which sets the device name, and SU,96 which sets the baud rate of the UART to 9600. I set it slow because I plan to use the software serial port on the Arduino.
The command 'D' tells you the general config of the module.
After replacing the RN41 in 2013, I couldn't get the Hyperterm route to work at all. The module seemed to connect but I never saw any reply from it. I ened up using a Mac, which paired happily with it (though I had to tell it not to use a passcode). The quickest way to get a serial terminal was to get Terminal up, then type screen /dev/tty.FireFly.blahblahblah 115200 (find the tty name with ls /dev/tty* and look for the FireFly).
Then type $$$ return, see the prompt from the module, and carry on as above.
The command set is documented here.
I built the Android Chat sample from the SDK (which is, more or less, a terminal with two-way serial comms). That would not talk to the RN41 to start with, but following the advice here:
http://groups.google.com/group/android-developers/browse_thread/thread/b2b609862188458a/426014f6bac285af?#426014f6bac285af
I changed the UUID in BluetoothChatService.java to this: private static final UUID MY_UUID = UUID.fromString("00001101-0000-1000-8000-00805F9B34FB");
I believe that's the UUID of the Bluetooth serial profile (SPP). And SPP is what the RN41 does.
With that change, I could type $$$ in BluetoothChat and have the module reply with CMD. So, that's Android->RN41 taken care of.
Next, I wired the RN41 to the Arduino pins 2 & 3 (using the resistor divider as specified in the spec sheet) and added NewSoftSerial code to echo my typing Once again, I connected via my hacked BluetoothChat, and saw my typing echo!
After that, I wrote a bit of image-processing code and built a simple binary protocol between Android and Arduino. NewSoftSerial is a bit slow, so I send the data one byte at a time over Bluetooth. It also turns off the interrupts, which means the servos don't work right, so I turn off the servos when listening to Bluetooth and turn off my NewSoftSerial port when driving the servos.
 Home | Artefacts| Robots